|
(SmartRipper is available here) With this method, you will rip each of the individual chapters, one-by-one, to your Hard drive. You will then remove the audio from each specific chapter. By ripping each chapter, you will actually be copying both the picture and all tha audio to your hard drive in the form of a .vob file. The downside to this is that it can take up to 6 gigs of hard drive space. But if you do them one-by-one, deleting the vob file after you've removed the audio, then it shouldn't take nearly as much space. Note: You may need to play the actual movie (not just the intro) for a few seconds (with your PC DVD Playing Software) to unlock the files. Sometimes SmartRipper will have no problem without this step. Run
SmartRipper.
A small box will scan through the files, then the main window will pop
open: 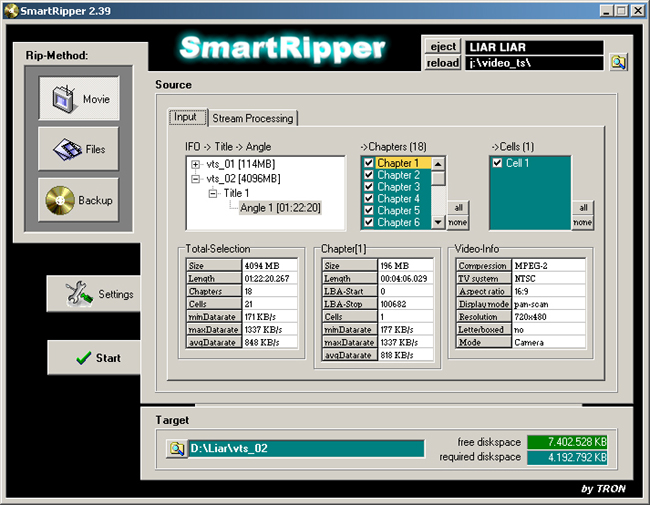
Before doing anything else, you might as well locate the correct audio track that you'll be selecting in the next step when you use DVD2AVI. Click on the "Stream
Processing" tab, then checkmark the "Enable
Stream Processing" box. The first
line is the video track, so ignore it. Below that are any
alternate language tracks available: 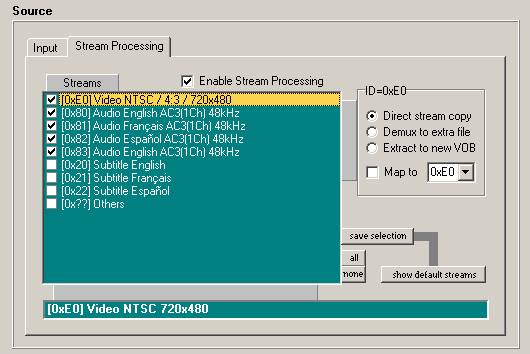
You should also note if the commentary track is (1Ch) or (2Ch). If it's only (1Ch) then there's NO reason to encode your mp3 in stereo. Keep this in mind for later or write it down. Now uncheck the "Enable Stream Processing" box and click on the "Input" tab. Okay, now you're back at the original page.

The main thing here is to select "every chapter" under "File Splitting". This will create an entirely new file for each chapter so when you get to the next step, the files are already separated Whatever you select should stay selected in the future. Click the OK button. Now you're back to the main page again.
Also, if you do not have a lot of room on your hard drive, you can go up to the "Chapters" window and check and uncheck each chapter one by one or do them in stages. Just make sure that you (re)name the files in numerical order so you can keep track of which one goes where. Click "Start" to begin the process (if you don't have enough HD space, the Start button will be hidden) If you want to make a test run, un-check all of the Chapters except one or two.
Okay,
now onto ripping the audio out of the resulting
.vob files |